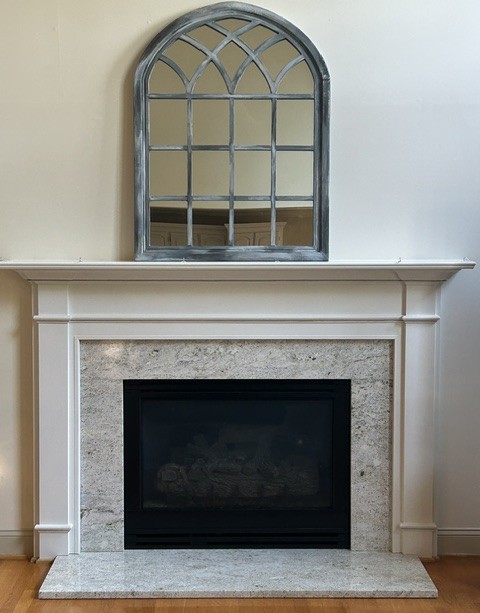
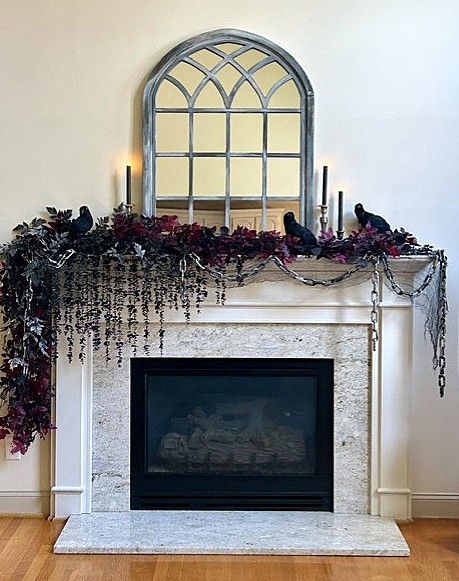
Before & After: This year’s Halloween mantel
Seasonal mantel decorating is one of those things that can look effortless when it’s finished, and slightly overwhelming when you’re standing in front of a completely bare mantel wondering where to begin.
The secret is that there really is a method behind all those beautiful layers. And this is one of the rare decorating moments where I’ll say it confidently: more really can be better.
Start With a Solid Base
Everything begins with a foundation that can actually hold what you’re building. I use small Command hooks along the front edge of the mantel. They’re discreet, but they give you the stability you need so everything doesn’t slide forward and off.
Once your hooks are in place, start with a basic garland. Choose one with branches or wired stems that can bend and wrap; this gives you something to anchor into and helps create fullness. After that first layer is secure, you can start weaving in additional garlands, different types of stems, and seasonal pieces.
Think of it like building a nest: the more intertwined everything is, the more natural and full it will look.
One thing I’ve learned: Buy more than you think you’ll need. Truly. I’ve made too many mid-project runs back to the store to pretend otherwise.
Skip the Symmetry, Keep the Balance
This is more of a personal choice, and symmetry can be beautiful, but for my seasonal displays, I prefer the drama of a little asymmetry. I love a good swag on one side, and especially since my mantel isn’t wide, that drop creates movement and makes the whole thing feel more intentional.
But you still want to keep it visually balanced. That’s where the chains and openness on the other side help create harmony without everything having to match.
Vary Your Heights
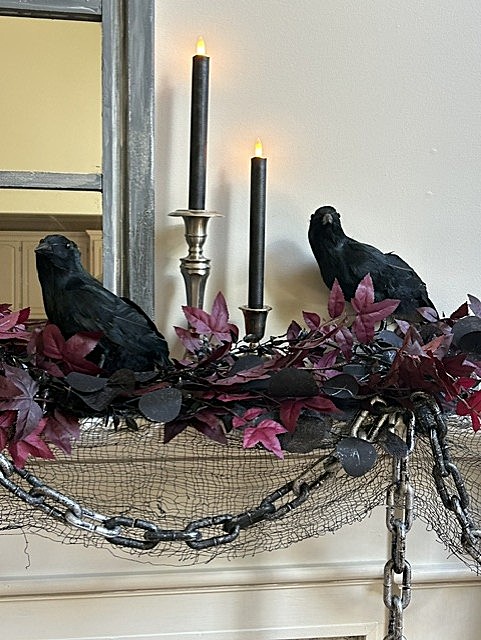
Be sure to vary the heights to keep things interesting. For me, the mirror is the main vertical anchor, while the crows and candlesticks add interest at different levels.
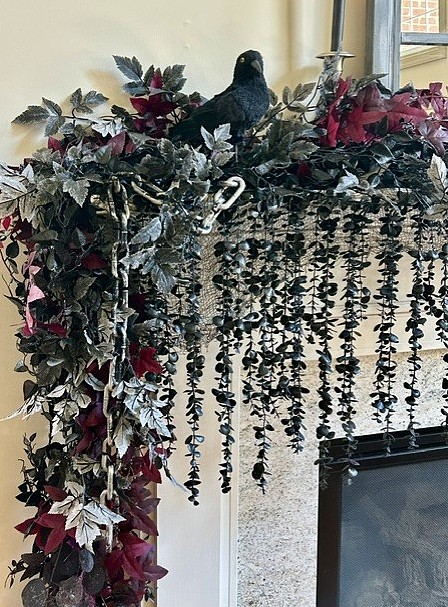
And don’t forget the area below the mantel. Varying lengths of stems or garland draping down add dimension and keep the whole arrangement from feeling flat. In spots where you want more volume, tuck in extra stems to mimic realistic foliage and give the display a sense of organic growth.
Use Variations of Your Colors
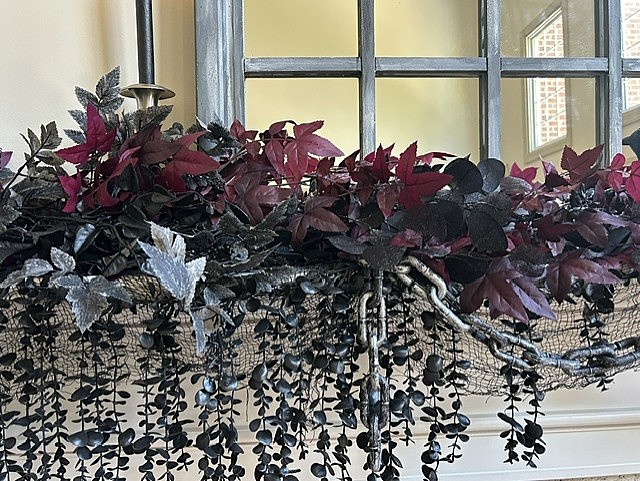
Color depth is part of what makes a display feel elevated. Instead of sticking to one shade, mix tones within the same family. Here, I used deep burgundy as the base, then layered in almost-black foliage, soft grey, and touches of black with glitter. The contrast creates richness, while the shared undertones keep everything cohesive.
Layer — Don’t Line Up
This is the difference between a styled mantel and one that looks like a row of decorations. Let pieces partially disappear into the greenery. Weave stems together, allowing more of one color to show in one area and another color to take over somewhere else. Allow stems to spill over the edge. Let some items sit deeper in the arrangement while others stand forward.
The goal is for everything to feel connected, like one story instead of individual characters standing in a line. It takes a little time, and you want a touch of randomness, but that’s exactly what creates the magic.
Then, Know When to Stop
More may be more when you’re building the swag itself, but that doesn’t mean every available space needs decorating. Once your focal point has enough presence, let it breathe. I left the hearth completely bare because adding more below would compete with everything happening above it.
Sometimes the best thing you can add to a room is nothing at all.
I love this type of Halloween décor. It’s dark, moody, a little unexpected, and not something you’ll see in everyone else’s home.
That’s one of the things I love most about seasonal decorating: it’s so easy to give it your own personality. And next year? Mine will probably look nothing like this one.


Leave a comment